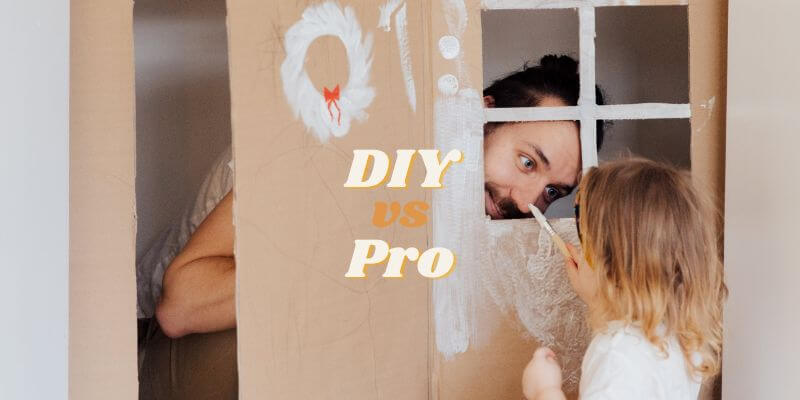
Introduction to DIY Painting Mistakes

Painting a room can be an exciting and rewarding DIY project. Whether you are giving your home a fresh new look or adding a personal touch to a space, painting allows you to express your creativity and transform the atmosphere of any room. However, even the most seasoned DIY enthusiasts can fall victim to common mistakes when it comes to painting.
In order to achieve professional-looking results and avoid unnecessary frustration, it is important to be aware of the top 10 mistakes to avoid in DIY painting projects. By understanding these pitfalls and learning how best to navigate them, you can ensure that your next painting endeavour is a success from start to finish.
Mistake 1: Not Preparing the Surface

One of the most common mistakes made when attempting a DIY painting project is neglecting to properly prepare the surface before starting. Failing to do so can result in an uneven paint job, peeling or flaking paint, and an overall unsatisfactory finish. In order to achieve a professional-looking outcome, it is essential to thoroughly clean and repair any imperfections on the surface being painted.
Before beginning your paint job, take the time to clean the surface using warm water and mild detergent. This will help remove any dirt, grease, or grime that may be present. Additionally, make sure to scrape away any loose or peeling paint using a putty knife or scraper. If there are any holes or cracks in the surface, fill them with spackle or caulk and smooth them over with sandpaper once dry.
Once all necessary repairs have been made, it is important to prime the surface before applying your chosen paint colour. Primer helps create a smooth base for the paint and ensures better adhesion and durability of the final coat. By taking these steps to properly prepare your surfaces before painting, you can avoid many potential issues and ensure a high-quality finished result.
Explanation of why surface preparation is crucial
Surface preparation is a crucial step in any painting project, whether it be for DIY or professional purposes. Ignoring this step can lead to unsightly results and a shorter lifespan for the paint job. One of the key reasons why surface preparation is important is because it allows for proper adhesion of the paint to the surface. If the surface is not properly prepared, such as being dirty or having loose and flaking paint, the new coat of paint will not adhere properly and may start to peel or chip off.
Another reason why surface preparation is crucial is that it helps to create a smooth and even finish. By removing any imperfections on the surface, such as dents, scratches, or rough patches, you can ensure that your painted walls or surfaces look professional and flawless. Additionally, proper surface preparation also helps in achieving an even colour distribution across all areas being painted.
Lastly, taking the time to prepare the surface before painting can save you both time and money in the long run. By addressing any underlying issues with the surface beforehand, such as repairing cracks or filling holes, you can prevent them from worsening over time. This means that your paint job will last longer without requiring frequent touch-ups or complete repainting projects. In summary, investing adequate time and effort into proper surface preparation before painting will ultimately result in a more durable and visually appealing finished product.
Tips on how to properly prepare different surfaces for painting
Preparation is key when it comes to achieving a professional-looking paint job. Before starting any painting project, it is essential to properly prepare the surfaces you will be working on. The first step is to ensure that the surface is clean and free of any dirt, dust, or grease. This can be done by using a mild detergent and water solution or a specialized cleaner depending on the surface type.
Next, it is important to repair any imperfections such as cracks, holes, or dents in the surface. This can be accomplished by filling them with spackling compound or putty and sanding them down until they are smooth and level with the rest of the surface. In addition, if there are any loose or peeling paint chips, they should be scraped off before proceeding with painting.
After addressing any repairs needed, it’s time to prime the surface. Priming helps create an even base for paint adhesion and can also help hide stains or discolourations on certain surfaces. Choosing the right primer for your specific project is crucial; there are different types available for various surfaces such as wood, metal, drywall, or masonry.
By following these tips and properly preparing different surfaces before painting, you can ensure a flawless finish that will last longer and look more professional. Taking this extra step not only improves the overall appearance but also increases durability and extends the life of your painted surfaces.
Mistake 2: Skipping Primer.

Skipping primer is a common mistake that many DIY painters make. Primer is a crucial step in the painting process as it helps to create a smooth and even surface for the paint to adhere to. Without primer, the paint may not stick properly or may appear blotchy and uneven.
Primer also helps to seal any porous surfaces, such as drywall or wood, preventing them from absorbing too much paint and leading to an uneven finish. It also helps prevent stains from bleeding through the paint, especially when covering dark or discoloured walls. In addition, using primer can help save time and money by reducing the number of coats of paint needed for full coverage.
To avoid this mistake, always take the time to apply a layer of primer before starting your painting project. Choose a high-quality primer that is suited for your specific surface type and follow the manufacturer’s instructions for application. By doing so, you will ensure better adhesion, smoother finish, and longer-lasting results for your painted surfaces.
Discussion on the importance of primer
One of the top 10 mistakes to avoid when painting is neglecting the importance of primer. Primer acts as a preparatory layer that helps in achieving a smooth and even paint finish. It creates a strong bond between the surface and the paint, ensuring better adhesion and durability. By using primer, you can enhance the coverage and longevity of your paint job.
Furthermore, primer also helps to hide any imperfections on the surface such as stains, discolouration, or previous paint colours. It provides an even base for your paint to adhere to, resulting in a more uniform and professional-looking finish. Without primer, you may find that your final coat of paint appears streaky or uneven due to inconsistencies in the surface.
In addition to these benefits, using primer can also save you time and money in the long run. It helps prevent excessive absorption of paint into porous surfaces like wood or drywall, reducing the amount of paint needed for proper coverage. This efficiency not only cuts down on costs but also saves you from having to apply multiple coats of paint to achieve satisfactory results.
Therefore, it is crucial not to overlook or underestimate the importance of applying primer before painting. Taking this extra step will ensure that your DIY painting project turns out beautifully with a long-lasting finish that withstands wear and tear over time.
Situations where the primer is especially necessary
One situation where using a primer is especially necessary for DIY painting is when you are working with porous or rough surfaces. Surfaces such as bare wood, drywall, or plaster tend to absorb paint unevenly, resulting in an inconsistent finish. By applying a coat of primer beforehand, you create a smooth and even base for the paint to adhere to. This not only ensures better colour coverage but also helps prevent future issues such as peeling or cracking.
Another instance where using a primer becomes crucial is when you want to change the colour of your walls dramatically. If you’re going from a dark colour to a lighter one or vice versa, using primer can make all the difference in achieving the desired results. A layer of primer acts as an intermediary barrier that prevents the previous colour from bleeding through and affecting the new one. It also enables the topcoat to achieve its true hue without any interference from the underlying surface.
There are various situations where using a primer becomes especially necessary in DIY painting projects. Whether it’s dealing with porous surfaces or making significant colour changes, incorporating this essential step into your process will ensure better adhesion, and consistent coverage, and ultimately lead to professional-looking results.
Mistake 3: Using the Wrong Type of Paint.

One common mistake in DIY painting is using the wrong type of paint for the project. It’s crucial to understand that different surfaces require different types of paint to achieve optimal results. Using interior paint on exterior surfaces, for example, can lead to premature fading and peeling due to exposure to harsh weather conditions. On the other hand, using exterior paint indoors might result in a strong odour that lingers for an extended period.
To avoid this mistake, it’s essential to read and follow the manufacturer’s instructions when selecting paint. The label will typically specify whether it is suitable for interior or exterior use and provide additional guidance regarding its recommended application methods. Additionally, understanding the specific needs of your project will help you choose between oil-based or water-based paints, as well as matte or gloss finishes. By using the right type of paint for each surface and environment, you can ensure a durable and aesthetically pleasing finish that stands the test of time.
Choosing the correct type of paint is vital in achieving a successful DIY painting job. Be mindful not only of whether it is intended for interior or exterior use but also consider factors like durability, finish, and application method. Taking these precautions will ensure that your efforts yield long-lasting results with minimal issues such as peeling or discolouration over time.
Overview of different types of paint and their uses
When it comes to DIY painting, understanding the different types of paint and their uses is crucial for achieving professional-looking results. One of the most common types of paint is acrylic paint, which is known for its fast drying time and versatility. It can be used on a variety of surfaces such as wood, metal, and canvas, making it a popular choice for both indoor and outdoor projects.
Another type of paint that DIY enthusiasts often turn to is latex paint. This water-based paint offers easy clean-up with soap and water and has low levels of volatile organic compounds (VOCs), making it an environmentally friendly option. Latex paint works well on interior walls and ceilings, providing a smooth finish that is resistant to cracking or peeling.
For those looking to add a touch of elegance or durability to their DIY painting project, oil-based paints are worth considering. They provide superior adhesion and durability compared to other types of paints but require longer drying times between coats. Oil-based paints are commonly used on trims, cabinets, doors, or furniture where a long-lasting finish is desired.
By familiarizing yourself with these different types of paints and their specific uses, you can make informed decisions when selecting the right one for your DIY painting project while avoiding some common mistakes along the way.
Tips on choosing the right paint for the job
When it comes to choosing the right paint for a DIY painting project, there are several factors to consider. Firstly, determine the type of surface you will be painting on. Different surfaces require different types of paint, such as latex or oil-based paints. It is essential to choose a paint that is compatible with the surface to ensure optimal results and longevity.
Another crucial factor to consider when selecting paint is its finish or sheen. The finish you choose can greatly impact the overall look and feel of your space. For instance, high-gloss finishes are ideal for areas that require frequent cleanings, such as kitchens and bathrooms, while flat finishes work well in low-traffic areas like bedrooms or ceilings.
Understanding colour selection is vital when choosing the right paint for your project. Take into account factors like lighting conditions in the room and existing colour schemes to create a cohesive and visually appealing result. Testing out small samples on your walls before committing to a large purchase can help you make an informed decision about which colour works best in your space. By considering these tips, you can confidently choose the right paint for any DIY painting job.
Mistake 4: Not Using Painter’s Tape.

One of the most common mistakes made by amateur painters is failing to use painter’s tape. Painter’s tape is an essential tool that helps create sharp, clean lines and prevents the paint from bleeding onto surfaces it shouldn’t. Without painter’s tape, achieving professional-looking results becomes much more challenging.
When painting a room or any surface with multiple edges and corners, using painter’s tape ensures that you can work with precision and confidence. It allows you to paint freely without worrying about making mistakes or smudging adjacent surfaces. Moreover, when removing the tape after painting, guarantees clean edges and avoids any unintentional damage to the newly painted surface.
Neglecting to use of painter’s tape can result in sloppy paint jobs and unprofessional outcomes. Investing in quality painter’s tape is a small step that can make a significant difference in the overall appearance of your painting project. By taking the time to properly mask off areas with painter’s tape before you begin painting, you’ll be able to achieve crisp lines and flawless results like a pro.
Explanation of the benefits of using painter’s tape
Using painter’s tape during DIY painting projects offers several benefits that can help achieve professional-looking results. Firstly, painter’s tape provides clean and crisp paint lines by preventing the paint from bleeding onto adjacent surfaces. This is especially important when painting edges, corners, or intricate details where precision is required.
Secondly, painter’s tape acts as a protective barrier, shielding surfaces from accidental drips, splatters, or brush strokes. It ensures that only the intended areas receive the paint and helps to minimize touch-ups later on. Additionally, it allows for easy removal without leaving behind any residue or damaging the underlying surface.
Painter’s tape promotes efficiency and saves time by eliminating the need for painstakingly cutting in with a brush along the edges. Its adhesive properties allow for quick and easy application while maintaining a tight seal against surfaces. By using painter’s tape properly throughout your painting project, you can greatly enhance accuracy and efficiency while minimizing mistakes and ensuring professional-quality results.
Tips on how to apply and remove painter’s tape properly
Applying and removing painter’s tape properly is crucial for achieving clean and crisp paint lines during DIY painting projects. To ensure successful application, start by cleaning the surface thoroughly to remove any dust or debris that could prevent the tape from sticking properly. It is also important to choose the right type of painter’s tape for your project, considering factors such as surface texture and the level of adhesion required.
When applying the tape, make sure to press it firmly onto the surface, smoothing out any bubbles or wrinkles along the way. To achieve straight lines, use a level or a straight edge as a guide when positioning the tape. Additionally, be mindful of overlapping sections to create seamless edges.
Removing painter’s tape requires some attention to detail as well. It is best to remove the tape while the paint is still slightly wet so that it doesn’t pull off any dried paint with it. Pulling at a 45-degree angle away from the painted surface can help in preventing any accidental chipping or tearing of fresh paint. Lastly, work slowly and carefully when peeling off the tape to ensure clean edges without leaving behind residue or damage on your freshly painted surfaces.
Following these tips on applying and removing painter’s tape properly, you can greatly improve your DIY painting results and avoid common mistakes that might compromise your finished project’s appearance.
Mistake 5: Painting in Poor Lighting.

One common mistake that DIY painters often make is attempting to paint in poor lighting conditions. Insufficient lighting can greatly impact the quality of your painting job. When you don’t have enough light, it becomes challenging to accurately see the colour and texture of the surface you are working on, leading to potential mistakes.
Painting in poor lighting conditions can result in uneven coverage, missed spots, or even the wrong colour altogether. It’s crucial to ensure that you have ample lighting before starting any painting project. Natural daylight is always best for true colour representation; therefore, try to choose a time when there is plenty of natural light streaming into the room. However, if you must paint at night or in a room with limited windows, invest in good-quality artificial lighting sources that mimic natural light as closely as possible.
Additionally, proper lighting also helps with visibility and ensures your safety while painting. Inadequate lighting may cause accidents such as tripping over equipment or missing potential hazards like cracks or bumps on the surface being painted. By ensuring adequate lighting conditions during your painting project, you will not only achieve better results but also create a safer environment for yourself and those around you.
Discussion on how poor lighting can affect the quality of the paint job
One common mistake that DIY painters often overlook is the significance of proper lighting during the painting process. Poor lighting conditions can have a detrimental impact on the quality of the paint job. Firstly, inadequate lighting can lead to uneven coverage and streaks on the painted surface. Shadows caused by insufficient light can make it challenging to identify missed spots or areas with inconsistent colour distribution.
Moreover, poor lighting can also affect colour accuracy. Natural and artificial light sources vary in their colour temperature, which influences how colours appear. Without adequate lighting, it becomes difficult to accurately gauge how a particular shade will look under different lighting conditions, leading to potential disappointments once the project is completed.
Furthermore, inadequate illumination may result in sloppy edges and missed details due to reduced visibility. Precise cutting-in around corners, edges, and trim requires good visibility to ensure clean lines and a professional finish. Insufficient light can cause oversights that require additional touch-ups or even necessitate repainting entire sections of the wall.
Proper lighting plays a crucial role in achieving a high-quality paint job when undertaking DIY projects. It helps prevent uneven coverage, ensures accurate colour representation, and allows for precise detailing. Thus, homeowners should prioritize adequate illumination throughout their painting process to avoid these common pitfalls associated with poor lighting conditions.
Suggestions for ensuring adequate lighting when painting
When it comes to painting, adequate lighting is essential for achieving the best results. Insufficient lighting can lead to missed spots, uneven coverage, and inaccurate colour choices. To ensure proper lighting while painting, there are a few suggestions that can be followed.
Firstly, natural light is always the best option as it provides the most accurate representation of colours. Whenever possible, position your workspace near a window or in a well-lit room during daylight hours. If natural light is limited or unavailable, consider investing in high-quality LED lights with a colour rendering index (CRI) of 90 or above. These lights mimic natural daylight and allow you to accurately see the true colours of your paint.
Additionally, it’s crucial to position your lighting source strategically. Avoid placing lights directly behind you as they may cast shadows on your work surface. Instead, position them at an angle towards your workspace to minimize shadowing and create an even illumination across the area you’re working on.
Lastly, don’t forget about task lighting. While overall ambient lighting is important for general visibility in the room, task lighting focuses specifically on illuminating your painting area. Use adjustable desk lamps or clamp lights that can be positioned precisely where needed to eliminate any shadows and ensure optimal visibility while painting.
Following these suggestions for ensuring adequate lighting when painting, you’ll create an environment that allows you to accurately assess colours and achieve professional-looking results in your DIY projects without any avoidable mistakes due to poor illumination.
Mistake 6: Not Using the Proper Brush or Roller

Using the proper brush or roller is essential for achieving a smooth and professional finish when painting. One common mistake is using a cheap or low-quality brush that sheds bristles, leaving unsightly marks on the painted surface. To avoid this, invest in high-quality brushes made from synthetic materials or natural fibres like nylon or polyester. These brushes will hold more paint and ensure even coverage without shedding.
Similarly, using the wrong type of roller can lead to an uneven application of paint and streaks on the walls. There are different types of rollers available, including foam, mohair, and microfiber rollers. Foam rollers are ideal for smooth surfaces like cabinets or doors while mohair rollers are better suited for textured surfaces. Microfiber rollers work well for both smooth and textured surfaces as they provide excellent coverage and reduce splatter. By selecting the appropriate roller for your specific painting project, you can achieve a flawless finish with minimal effort.
Not using the proper brush or roller is a common mistake that can greatly affect the outcome of your DIY painting project. Investing in high-quality brushes and selecting the right type of roller based on your surface texture will ensure a professional-looking result without any unwanted marks or streaks. Remember to always choose tools that are suitable for your specific painting needs to achieve optimal results in your home improvement endeavours.
Overview of different types of brushes and rollers
When it comes to DIY painting projects, selecting the right brushes and rollers is crucial for achieving a professional-looking finish. There are various types of brushes and rollers available on the market, each designed to serve different purposes. A flat brush, for example, is ideal for cutting in or painting large areas with precision. On the other hand, an angled brush is perfect for reaching tight corners and edges.
Rollers also come in different varieties, including foam rollers, mohair rollers, and nap rollers. Foam rollers are great for smooth surfaces like cabinets or doors because they ensure a uniform finish without leaving any visible marks behind. Mohair rollers are best suited for semi-smooth to rough surfaces such as stucco or textured walls due to their ability to hold more paint and provide better coverage. For larger projects that involve high-textured surfaces like popcorn ceilings or brick walls, a nap roller with longer fibres can effectively reach into crevices and provide an even coat of paint.
It’s important to note that choosing the right brush or roller will largely depend on the type of surface being painted as well as the desired finish. Understanding these variations among brushes and rollers will allow DIY painters to make informed decisions when it comes to selecting the appropriate tools for their specific projects while avoiding common mistakes that could compromise the quality of their work.
Tips on choosing and using the right brush or roller for the job
When it comes to painting, choosing the right brush or roller is essential for achieving a professional-looking finish. Firstly, consider the type of paint you are using. For latex or water-based paints, synthetic brushes and rollers are recommended as they do not absorb moisture and provide a smoother application. On the other hand, natural bristle brushes are suitable for oil-based paints as they hold more paint and leave behind fewer brush marks.
Furthermore, it is important to select the appropriate size of brush or roller for your project. A larger brush will cover larger areas more efficiently, while a smaller one provides better control and precision in tight spaces or when working on intricate details. Similarly, when using rollers, opt for wider ones for large surfaces like walls or ceilings and narrower ones for trim work.
Lastly, understanding how to use your chosen brush or roller correctly can make a significant difference in achieving satisfactory results. When using a brush, ensure that you apply even pressure while moving it smoothly along the surface to avoid streaks or lines. To prevent drips with rollers, start by applying light pressure and gradually increase it as you move across the surface in overlapping strokes.
Following these tips on selecting and utilizing the right brushes and rollers based on paint type and project size/type, you can enhance your DIY painting skills while avoiding common mistakes that may compromise your end result.
Mistake 7: Applying Too Much or Too Little Paint

One common mistake when painting is applying too much or too little paint. Applying too much paint can lead to drips and uneven texture on the surface, making it look unprofessional. It can also cause the paint to take longer to dry and may result in a less durable finish. On the other hand, applying too little paint can result in an inconsistent colour and poor coverage.
To avoid these mistakes, it is important to follow the manufacturer’s instructions regarding the recommended thickness of each coat of paint. Using a roller or brush with the appropriate nap or bristle length for your project can also help ensure that you apply an even coat of paint. Additionally, taking your time during the application and using smooth strokes will help prevent excessive buildup or streaks.
Remember that it is better to apply multiple thin coats of paint rather than one thick coat. This approach allows each layer to dry properly before adding another, resulting in a smoother finish. By paying attention to how much paint is being applied and making adjustments as needed, you can achieve a professional-looking result without wasting materials or compromising durability.
Explanation of the problems caused by applying too much or too little paint
When it comes to painting, finding the right balance is crucial. Applying too much or too little paint can lead to a host of problems that can affect the overall quality and durability of the paint job.
Applying too much paint can result in drips and runs, leading to an uneven finish. These imperfections not only look unprofessional but can also be difficult to fix once the paint has dried. Additionally, excess layers of paint can cause the surface to become overly thick and prone to cracking or peeling over time.
On the other hand, applying too little paint may result in poor coverage and an inconsistent colour tone. This means that certain areas may appear lighter or have a different texture compared to others, creating an unsightly appearance. Moreover, insufficient paint coverage can leave surfaces vulnerable to moisture damage and make them more susceptible to staining or fading.
Achieving the right amount of paint ensures a flawless finish that not only enhances the aesthetic appeal but also provides long-lasting protection for your surfaces. Therefore, taking care not to apply too much or too little paint is essential for achieving professional-looking results during any DIY painting project.
Tips on how to apply the right amount of paint
When it comes to DIY painting, one of the most common mistakes is using too much or too little paint. Applying the right amount of paint is crucial for achieving a professional-looking finish. To avoid this mistake, start by preparing your surface properly, ensuring it is clean and smooth. This will help the paint adhere evenly and prevent excessive absorption.
Next, choose the appropriate brush or roller for your project. The size and type of applicator can greatly affect how much paint you apply. Use a smaller brush or roller for tight spaces and intricate details, while a larger one may be more suitable for larger areas. Additionally, consider thinning your paint if necessary, especially when applying multiple coats.
While applying the paint, use steady strokes in one direction to ensure even coverage. Avoid overloading your brush or roller with too much paint as this can lead to drips and uneven application. Instead, load an appropriate amount of paint onto your applicator and work in manageable sections.
Following these tips on how to apply the right amount of paint, you can achieve professional results in your DIY painting projects while avoiding common mistakes that may compromise the final outcome.
Mistake 8: Painting Over Dirty or Damaged Walls

One of the most common mistakes homeowners make when attempting a DIY painting project is painting over dirty or damaged walls. It may seem tempting to skip the necessary prep work and jump straight into applying a fresh coat of paint, but this can lead to disappointing results. Dirt, dust, and grime can prevent the paint from adhering properly to the surface, leaving visible streaks and uneven patches. Additionally, painting over damaged walls without addressing the underlying issues can result in a less-than-perfect finish.
Before beginning any painting project, it is crucial to thoroughly clean the walls by removing any dirt, grease, and stains. This can be done using a mild detergent mixed with water and a soft sponge or cloth. For tougher stains, such as crayon marks or water damage, consider using a specialized cleaner or primer before proceeding with painting.
Furthermore, it is important to inspect the walls for any signs of damage such as cracks, holes, or peeling paint. These issues should be repaired prior to painting in order to achieve smooth and flawless results. Small cracks can be filled with spackling paste while larger holes may require patching compound or joint compound for proper repair.
By taking the time to clean and repair your walls before starting your DIY painting project, you will ensure that your efforts yield professional-looking results that will stand the test of time.
Discussion on why painting over dirty or damaged walls can lead to poor results
One of the common mistakes many DIY painters make is painting over dirty or damaged walls. While it may seem like a quick fix, this approach often leads to poor results. Firstly, painting over dirty walls can cause the new paint to adhere unevenly, resulting in streaks or patches that are visibly different from the rest of the wall. Additionally, dirt and grime on the surface can prevent proper adhesion of the paint, causing it to peel or flake off over time.
Similarly, painting over damaged walls without addressing the underlying issues can also lead to unsatisfactory outcomes. For instance, cracks or holes in the wall need to be properly repaired before painting; otherwise, they will show through and mar the final finish. Furthermore, if there are any water stains or mould present on the walls, simply covering them up with paint will not solve these problems and may even exacerbate them in the long run.
Taking shortcuts by painting over dirty or damaged walls can result in disappointing results for DIY painters. It is important to thoroughly clean and repair surfaces before beginning a new paint job to ensure a smooth and professional-looking finish that will last for years to come.
Tips on how to clean and repair walls before painting
Before embarking on a painting project, it is crucial to thoroughly clean and repair the walls in order to achieve a smooth and flawless finish. Start by removing any loose paint or wallpaper using a scraper or sandpaper. Next, wash the walls with warm water and mild detergent to remove dirt, grease, or stains. For stubborn stains, consider using a mixture of baking soda and water or a specialized wall cleaner.
After cleaning, inspect the walls for any cracks, holes, or dents. Use spackling paste or putty knife to fill in these imperfections and ensure an even surface. Allow the filler to dry completely before sanding it down gently to create a seamless transition between the repaired area and the rest of the wall.
Once all repairs have been made, lightly sand the entire surface with fine-grit sandpaper. This will help remove any remaining imperfections while also providing better adhesion for the paint. Finally, wipe down the walls with a damp cloth to eliminate dust particles before proceeding with priming and painting.
Mistake 9: Not Allowing Enough Drying Time.

One common mistake many DIY painters make is not allowing enough drying time between coats or before moving furniture back into a freshly painted room. Rushing this crucial step can result in uneven paint application, smudging, and even damage to your furniture or walls. It’s important to remember that different types of paint and environmental factors can affect drying times, so it’s always best to follow the manufacturer’s instructions for the specific paint you are using.
To ensure proper drying, it is recommended to wait at least 24 hours between coats of paint. This allows each coat to fully dry and cure before applying another layer. Additionally, if you are painting multiple rooms or areas within a space, it’s essential to give each section enough time to dry completely before moving on. Patience is key when it comes to painting projects as rushing through the process can lead to unsatisfactory results and require additional touch-ups in the future.
By not giving adequate drying time for your paint job, you risk ruining all your hard work by smudging or damaging the newly applied layers of paint. Taking the time to allow each coat of paint sufficient drying time will ultimately lead to a more professional-looking finish that you can be proud of for years to come. So resist the temptation to rush through this essential step and instead focus on patience and attention to detail – your finished project will thank you!
Explanation of the importance of allowing enough drying time between coats
Allowing enough drying time between coats is a crucial step in achieving a professional-looking paint job. It ensures that each layer of paint has sufficient time to dry and cure properly, leading to a smooth and even finish. Rushing this process can result in various issues such as peeling, bubbling, or an uneven appearance.
One primary reason why it is important to allow for adequate drying time is to promote good adhesion between the layers of paint. If the previous coat hasn’t fully dried before applying the next one, the new coat may not adhere properly. This can lead to problems down the line, as the paint may easily chip or peel off.
Moreover, allowing ample drying time also allows for better colour consistency and coverage. When each layer dries completely before applying another one, it prevents colours from bleeding into each other or becoming distorted. Additionally, it allows for a more consistent application of paint across all surfaces and helps achieve an even tone throughout the project.
In conclusion, giving enough drying time between coats is essential for ensuring a flawless and durable paint job. It facilitates proper adhesion between layers of paint while promoting colour consistency and even coverage. Taking this extra step will ultimately save both time and effort by preventing potential issues that could arise from rushing through the painting process.
Tips on how to ensure the paint is fully dry before applying another coat
One of the most common mistakes people make when painting is not allowing enough time for the paint to fully dry before applying another coat. This can lead to a variety of issues, including uneven coverage and streaks in the finished result. To ensure your paint is completely dry before moving on to the next coat, there are a few simple tips you can follow.
Firstly, it’s crucial to read and follow the manufacturer’s instructions regarding drying times. Different types and brands of paint may have different drying times, so be sure to check this information before starting your project. Additionally, factors such as temperature and humidity can affect drying times, so take these into consideration as well.
Another useful tip is to use a fan or open windows to improve air circulation in the room where you are painting. Adequate airflow helps speed up the drying process by allowing moisture in the paint to evaporate more quickly. If possible, consider using a dehumidifier or turning on an air conditioner in humid environments.
Lastly, it’s essential not to rush through each coat of paint. Allow ample time for each layer to dry according to the manufacturer’s instructions before moving forward with additional coats. Patience is key when it comes to achieving professional-looking results in any DIY painting project.
Mistake 10: Not Cleaning Up Properly

One common mistake that DIY painters make is not cleaning up properly after completing a painting project. While it may seem like a minor detail, neglecting to clean up can lead to long-term damage and affect the overall appearance of your paint job. Leaving brushes, rollers, and other painting tools dirty can cause them to harden or become clogged with dried paint, rendering them useless for future projects.
Moreover, failing to clean up spills and drips can result in permanent stains on floors or furniture. It’s important to take the time to wipe away any paint splatters or spills immediately using a damp cloth or sponge. Additionally, disposing of paint cans and other hazardous materials properly is crucial for environmental reasons, as well as complying with local regulations.
By ensuring you thoroughly clean all painting tools and surfaces after each project and dispose of waste responsibly, you will maintain the quality of your equipment while also promoting a safe and clean environment for yourself and others. Don’t let laziness compromise the success of your DIY painting endeavours; take the extra few minutes to tidy up properly!
Discussion on the importance of proper cleanup
Proper cleanup is an essential aspect of any DIY painting project. Neglecting this step can lead to a variety of problems, including paint damage, health hazards, and a messy overall appearance. Firstly, failing to clean your painting tools thoroughly can result in dried paint buildup, making it difficult or even impossible to reuse them in the future. This not only wastes money but also adds unnecessary waste to the environment.
Moreover, improper cleanup can lead to health risks. The paint contains chemicals that can be harmful if ingested or inhaled for an extended period. Failing to clean up spills or splatters on surfaces where food is prepared or consumed poses potential dangers for those who come into contact with it. Additionally, leaving brushes and rollers unwashed may result in residual paint transferring onto other surfaces unintentionally, leading to accidental ingestion or inhalation.
Lastly, proper cleanup ensures a finished project looks professional and well-executed. Leaving behind drips, smudges, or stray brush strokes diminishes the overall aesthetic appeal of your hard work. Taking the time to tidy up properly after completing a painting job demonstrates attention to detail and a commitment to quality craftsmanship.
Proper cleanup cannot be underestimated when undertaking any DIY painting project. It not only preserves your painting tools for future use but also safeguards against potential health hazards caused by lingering paint residues. Furthermore, ensuring a clean finish enhances the overall look and professionalism of your workmanship.
Tips on how to clean brushes, rollers, and other tools
When it comes to DIY painting, one of the most important aspects is properly cleaning your brushes, rollers, and other tools. Neglecting this step can lead to a build-up of dried paint, which can affect the quality of your work in future projects. To ensure a smooth and hassle-free painting experience, here are some tips on how to effectively clean these essential tools.
Firstly, always start by removing excess paint from the brush or roller before cleaning. Use a putty knife or old cloth to scrape off any remaining paint. Next, if you are working with water-based paints, such as latex or acrylics, simply rinse the brushes and rollers under warm water until the water runs clear. For oil-based paints, mineral spirits or paint thinner should be used for cleaning.
After rinsing with water or solvent, use mild soap and warm water to thoroughly wash the bristles or nap your brushes and rollers. Gently massage the soap into them while ensuring that all traces of paint are removed. Rinse them again under running water until they are completely clean.
Lastly, after washing your tools, allow them to air dry completely before storing them away for future use. Properly drying ensures that no moisture remains in bristles or naps that could potentially ruin their shape or quality over time.
Conclusion
In conclusion, avoiding these common mistakes in DIY painting can save you time, money, and frustration. By taking the time to properly prepare your surfaces, using high-quality tools and materials, and following the correct techniques, you can achieve professional-looking results. Remember to always test your paint colours before committing to a whole room or area, as this will help you avoid any regrets later on.
Additionally, being patient and allowing each coat of paint to fully dry before applying the next one is crucial for achieving a smooth and even finish. Rushing through the process may result in streaks or uneven coverage. Lastly, don’t forget about proper clean-up after completing your painting project. Taking care of your brushes, rollers, and other tools by cleaning them thoroughly will ensure their longevity and allow for future use.
Overall, with careful planning and attention to detail, you can successfully tackle any DIY painting project while avoiding these top 10 mistakes commonly made by beginners. Following these guidelines will not only enhance the appearance of your space but also provide a sense of accomplishment knowing that you were able to achieve professional results on your own. Happy painting!
Recap of the top 10 DIY painting mistakes and how to avoid them
1. Not properly preparing the surface:
One of the most common mistakes in DIY painting is failing to adequately prepare the surface before applying paint. This includes not cleaning or sanding surfaces that are dirty or uneven, which can lead to a poor finish and paint that doesn’t adhere properly. To avoid this mistake, it’s essential to thoroughly clean the surface, remove any loose or flaking paint, and smooth out any imperfections with sandpaper or filler.
2. Choosing the wrong type of paint:
Another significant mistake is selecting the wrong type of paint for a particular project. Whether it’s using interior paint on an exterior surface or using a flat finish where semi-gloss would be more appropriate, choosing the wrong type of paint can result in a subpar outcome. It’s crucial to carefully read and follow the instructions on paint cans, consult experts at hardware stores if needed, and consider factors like location (indoor vs outdoor), material (wood vs metal), and desired finish (glossy vs matte) when selecting your paint.
3. Neglecting proper ventilation:
Failing to ensure adequate ventilation while painting can have serious consequences for both health and final results. Many paints emit harmful fumes that can be hazardous if inhaled over an extended period or in confined spaces without proper airflow. It’s important to open windows, use fans or exhaust systems where available, and wear a mask specifically designed for painting to protect against breathing in toxic chemicals.
Reminder for your next DIY painting project with these tips in mind
When it comes to tackling a DIY painting project, preparation is key. Before you even pick up a brush, make sure to properly prepare the surface by cleaning and sanding it. This will ensure that the paint adheres well and results in a smooth finish. Additionally, don’t forget to prime the surface before applying the paint, especially if you’re working with bare wood or previously painted surfaces. Primer helps to create an even base and can prevent any stains or discolouration from bleeding through.
Another important tip is to choose the right type of paint for your project. Consider factors such as durability, finish, and colour options when selecting your paint. It’s also worth investing in high-quality brushes and rollers for a more professional-looking result. Remember to take your time during the painting process – rushing can lead to sloppy workmanship and unsatisfactory results.
Lastly, don’t underestimate the importance of proper ventilation while painting. Open windows or use fans to circulate fresh air throughout the room, especially if you’re working with oil-based paints which can release strong fumes. By keeping these tips in mind, you’ll be well-equipped to approach your next DIY painting project with confidence and achieve beautiful results that will last for years to come.